


1978 H-D FLH BUILD: PAGE 3
It is amazing how many small details a person has to attend to in order to obtain the character they desire. Not only is it the cosmetics but the mechanics of making the cosmetics actually fit and function. Sometimes you can put days into machining and making one part that seems like a great idea but once bolted on looks like junk. See the picture dead center below. I decided to machine and build a custom light bar to hold the guide lights and blinkers. I machined all the parts, TIG welded them together, added 23k gold leaf into the custom cut letters and it just looked wrong. The Ol Lady hated it, I was ambivalent at best but the three days burned in manufacture, cost of billet aluminum and gold leaf made me want to use it. Finally a couple of scooter friends voted with the Ol Lady and I ditched it for a traditional styled light bar.
CHANGING IT ALL BACK & TO LOOKING FOR "THE LOOK"
In the above left and right pics you can see the decision making proces on some other simple parts. The Left photo shows a seat and fender struts that didn't make the cut. The photo above right shows the seat and fender struts that made it to the rifinal version. Also in right hand photo you see the three bar luggage rack. That piece is another older part that could have been purchased as a repop but I stuck to my guns and put a couple of days into restoring a factory original of of a panhead. I even had to unbolt and rebolt several times deciding which way I wanted it oriented. On our 1973 FLH it mounts opposite of this bike. But with this way the tour pack sits closer to the rider once I strap my rain suit behind the seat it makes for a nice back rest. Also it moves the load forward for more even weight distribution when you pack heavy.
IT ALL LOOKS MUCH BETTER AFTER MEDIA BLASTING
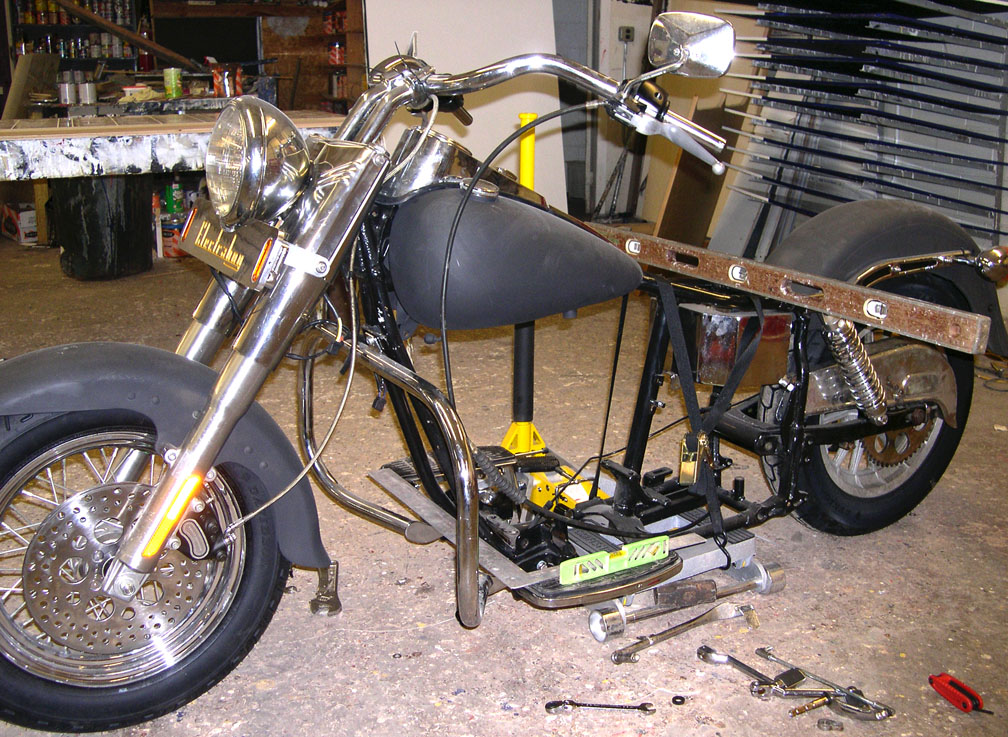


The above left photo shows hillbilly but sure fire method to get the floorboards mounted correctly. With the bike on the lift you get it perfectly level on its left/right axis. Then you get the floorboard your 100% satisfied with level. After that, all it takes is a square and third level to ensure that the opposite floorboard is in perfect alignment with the other. The pthe bike photo on the right shows a gold toned Harley Eagle mounted on the oil tank. I left the other side bare and just looked at it for a day or so. Eventually the bike told me it didn't want the extra bling. The centr picture is the beginning of my original attempt to make a modern 11" brake fit the four speed swing arm. At this time the shock mount was in its original position which was in the way. I did machine a mechanism to make it work but not well as I wanted. That is when I started experimenting with moving the shock mount points to give me room to work out the brake mounting solution.
CHOPPED UP EVERYTHING ELSE SO WHY NOT THE SWINGARM TOO


Couldn't I leave just one thing alone on the frame? NOT!!! For folks not familiar with the swing arm of a four speed frame they normally have two threaded blocks on top to mount the lower end of the shocks. I shaved the shock mounts and moved them to the bottom of the swing arm to lower the bike. (See center pic above) The great thing about mock up and design is you get to test before final build is started. I discovered that with the mounts moved that far, the bike was way too low. The tire rubbed the underside of the fender when I bounced on it hard, the frame set so low it wouldn't clear a bottle top in a parking lot and even a two inch under stock kick stand wouldn't fit. So for the next try drilled a hole in the center of the swing arm, welded in a steel tube and threaded it to the proper size and pitch for H-D factory correct lower shock mounting bolts. (Left pic above)
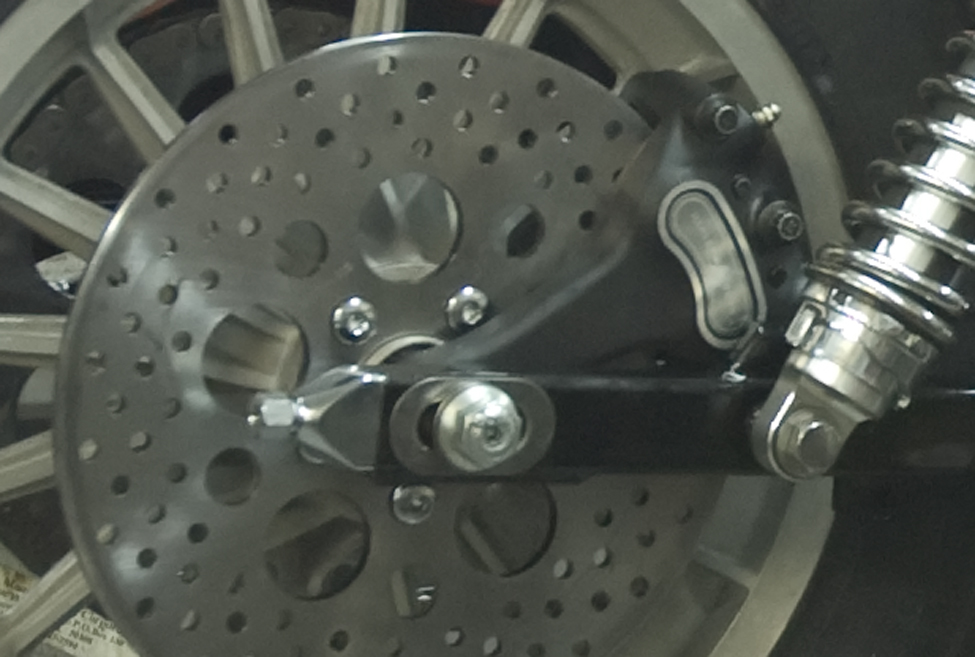
Then to add insult to injury in the whack and weld category I added a custom "slide bracket" to the top of the swing arm for lack of a better term which allowed for a Harley MoCo 11" brake caliper and 11" stainless steel rotor to be installed. Harley-Davidson four speed frames were designed for 10" brakes front and rear. We had to add a very expensive custom billet rear caliper on our 1973 four speed putt to allow it to stop the same week you stepped on the brake pedal. Knowing how the Wide Glide stopped with its factory 10" brakes I knew I could not live with that system on a bagger that I intended to ride regularly. You can see the new brake braket in the center photo and how the caliper sides in its groove according to axle adjustment in the right photo.
I did not buy some over priced custom solution as I believe modern factory H-D 11" brakes are more than adequate for the job of binding up a puttercycle. I purchased a factory correct brand new set of MoCo brakes with factory pads and stainless steel rotors. Dreamsickle stops like a cat on shag carpet with glue on its paws.
DREAMSICKLE BUILD PAGE 1 DREAMSICKLE BUILD PAGE 2
DREAMSICKLE BUILD PAGE 3 DREAMSICKLE BUILD PAGE 4
DREAMSICKLE BUILD PAGE 5 DREAMSICKLE BUILD PAGE 6
DREAMSICKLE BUILD PAGE 7 DREAMSICKLE BUILD PAGE 8
DREAMSICKLE BUILD PAGE 9 DREAMSICKLE BUILD PAGE 10
NAVIGATION


THE PHOTOS & TEXT ON THIS SITE IS COPYRIGHTED. NO PORTION MAY BE REPRODUCED WITHOUT WRITTEN CONSENT.